|
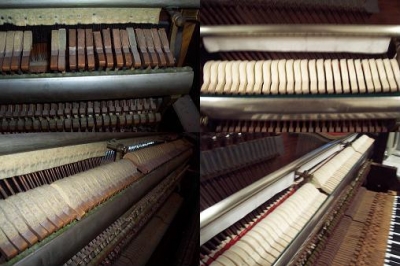
Rebuilt Wormwith Upright PianoThis rebuilt upright piano is an example of an instrument that was totally unusable and now provides musical enjoyment again. It was built by the Wormwith Piano Company in Kingston, Ontario prior to 1900. It has spent much of its life with one family, providing many fond memories. When I first encountered it, it was in very poor condition. It needed a number of repairs to put it back into good playing order. You can see the before and after pictures below. I replaced the key-tops, key-bed felt, hammers, dampers, bridle straps, and all the tuning pins. At this point I will take the opportunity to discuss the repairs made to this rebuilt upright piano. If a piano still has ivory keys in good condition, with a few missing or broken ones, it makes good sense to repair and clean. After any necessary repairs have been done, the key-tops can be buffed. This will give them a lovely satiny feel. However, this is not very often the case. Often you will find that many of the key-tops are missing or broken. This makes it very difficult to get consistent colouring and feel to the key-board. In these cases it makes more sense, from both a financial and an aesthetic point of view, to replace them with plastic key-tops with fronts attached. You will now have a clean new and consistent appearance. The type of key-tops that have the fronts already attached to the upper portion look good and tend to stay glued more permanently. The key-bed felt is found under the keys. There is a strip of felt at the back of the keys and a small circle of felt at the balance rail or middle rail and larger, thicker circles of felt at the front rail. Occasionally, the felt is still in reasonable condition after even a hundred years. This will only be the case if the piano has been kept in a very clean and dry environment. Very often the felt is packed and hardened and moth-eaten or damaged by mice. In these cases, it is necessary to remove the old felt and clean the key-bed very well. The new felt is then set in place. There are different thicknesses available, so it is necessary to use the correct ones for your piano. After this is done, the keys are levelled and the correct key-dip or key travel is established by means of paper punchings or spacers, to compensate for inconsistencies in the key, key bed, or the felt. Hammers are a very important element in producing a pleasant piano sound in any rebuilt upright piano. If a piano is still structurally sound it makes sense to replace the hammers. If the sound-board is still in good condition and functioning well and the bridges are sound, old hammers can be the weak link. New hammers are made by forcing a thick layer or several layers of felt around a wooden molding. The angle is very sharp, and it takes great force. The felt is then glued and sometimes stapled in place. This forcing gives the hammer its character. The felt closest to the wood molding is greatly compressed and the felt on the outer surface is under great tension or stress. When these hammers are properly voiced the sound will continue to build for a moment after the string is struck before the sound starts to die away. An old or badly voiced hammer will have more harsh, brittle sound at impact and then die away immediately. Old hammers can be muffled or inconsistent as you move up or down the key-board. A new set of hammers can do a great deal in restoring a piano to its original beautiful sound. Dampers can become ineffective for damping the sound of the piano over time. The felt will get both packed and worn where they contact the strings. Eventually, you will hear the sound continuing to echo through the bass strings, even after you stop playing. When this situation develops, the greatest benefit for money is gained by replacing just the bass dampers (but replacing all the dampers will of course give the best results). Bridle straps go between the hammer butt and the wippen to keep them functioning together. When they get worn and break, you will often experience the action functioning poorly, or not at all. Replacing the tuning pins is recommended when there is no longer enough friction in the wood to keep the tuning pin from slipping. Over years and years of humidity swelling the wood and compressing the wood fibers against the pin during the summer, and then in the winter drying out again leaves the pin too loose in the hole. Replacing all the tuning pins is a time consuming and tedious task. The tension has to be let off on all strings and the string released from the tuning pin. The tuning pin is then removed. A slightly larger pin is connected to the string and the tuning pin is driven back into the hole. Tension is put back on the strings and the piano is tuned again. It takes a few tunings before the tuning is stable. Now, a few years later, a whole new generation of children are taking lessons on this lovely old Wormwith rebuilt upright piano. It plays beautifully and has a wonderful tone.


|